Leave Your Message

7 Geyser Pressure Valve Tips Every Buyer Should Know?

Choosing a Geyser Pressure Valve is not a minor plumbing decision. It affects heat, pressure, leakage, maintenance, and household safety. A small brass valve may sit unnoticed above a geyser, yet it must respond when water expands inside a sealed tank. That moment is critical.

The U.S. Department of Energy reports that water heating represents about 18% of residential energy use. This figure explains why geyser performance matters, but energy efficiency must never replace pressure protection. ASME standards and the International Plumbing Code also require properly selected temperature-and-pressure relief protection for many storage water heaters. Requirements vary by location, installation type, and appliance design. Check the manual.

Dan Holohan, a respected hydronic-heating educator, has often stressed this practical principle: “A safety valve is there to protect the system when everything else fails.” The wording is simple. The inspection is not. Buyers should compare pressure ratings, temperature ratings, connection sizes, discharge paths, materials, certification marks, and replacement intervals. A valve that looks identical may have a different set pressure. That difference matters.

This guide presents seven Geyser Pressure Valve tips for more confident buying. It considers real details, such as mineral deposits around the outlet, a dripping discharge pipe, and a valve installed without safe drainage. These clues deserve attention. They are not decorative issues.

No checklist is perfect. I have seen buyers focus on price and overlook certification. That mistake is understandable, but avoidable. Use manufacturer documentation, qualified installation advice, and applicable local codes before making the final choice.
7 Geyser Pressure Valve Tips Every Buyer Should Know?

What a Geyser Pressure Valve Does and Why It Matters

What a Geyser Pressure Valve Does and Why It Matters

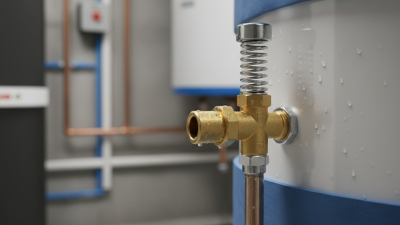
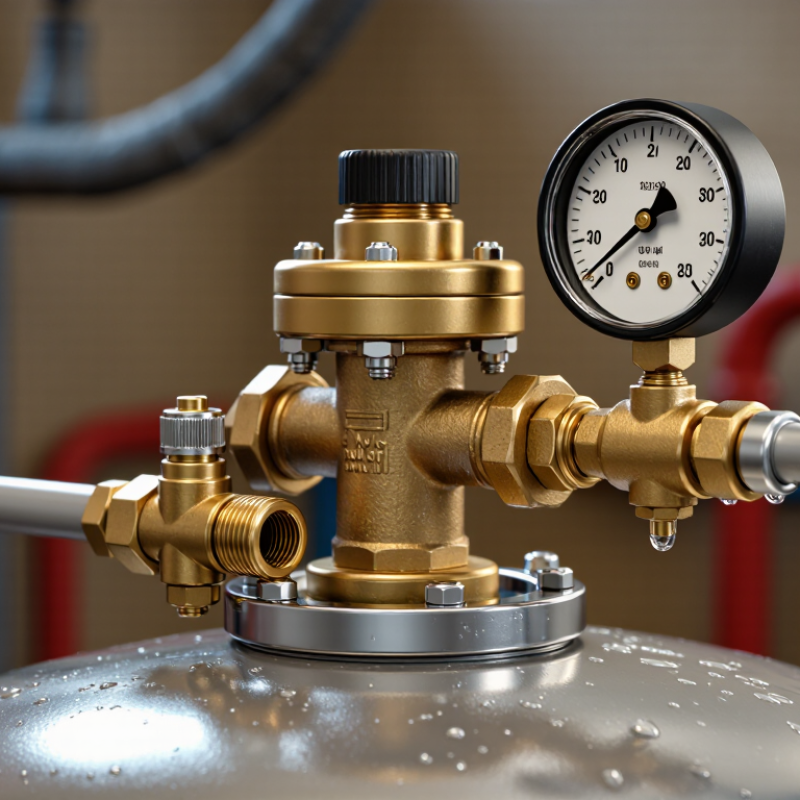
A geyser pressure valve protects the tank when heat causes water to expand. Without relief, pressure can rise inside a sealed cylinder. The valve opens and releases water through a discharge pipe. It is a small component with a serious job.

The U.S. Department of Energy reports that water heating uses about 18% of household energy. That figure makes correct temperature and pressure control important. However, a pressure valve is not a pressure regulator. It does not maintain steady supply pressure. It responds during unsafe pressure or temperature conditions. The 2024 International Plumbing Code requires relief valves and properly directed discharge piping for many water-heating installations. Never cap the outlet. Never block it with a decorative fitting.

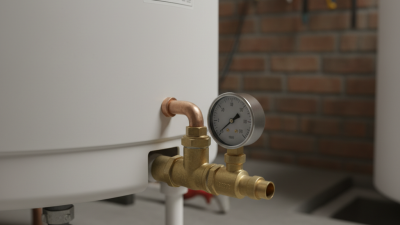
Check the valve’s pressure rating, temperature rating, connection size, and certification before buying. Match those details with the geyser’s data plate, not guesswork. A visible discharge pipe should point downward and end safely above an approved drain area. The ASME Boiler and Pressure Vessel Code provides widely used technical requirements for relief devices, but local rules can differ. That part is easy to overlook.

A practical test is simple. Lift the test lever briefly and confirm a clean flow, then release it. If water continues dripping, replace the valve through a qualified technician. I would not call occasional testing perfect; sediment can hide inside older systems. The U.S. Department of Energy also notes that lower water-heater temperatures can reduce energy use and scald risk, but household needs still require careful adjustment.
How to Choose the Correct Pressure and Temperature Ratings

7 Geyser Pressure Valve Tips Every Buyer Should Know

How to Choose the Correct Pressure and Temperature Ratings

A geyser pressure valve protects the tank from dangerous pressure and heat buildup. Choose its pressure rating from the geyser’s specifications, not guesswork. The valve setting must remain below the tank’s maximum working pressure. A higher rating is not automatically better. It may allow unsafe pressure before releasing water. In practical inspections, I have seen buyers select valves by pipe size alone. That shortcut is unreliable.

Tip 1: Check both ratings on the valve label. Pressure may appear in bar, kPa, or psi. Temperature is commonly listed in Celsius or Fahrenheit. Never compare numbers without checking the units. Tip 2: Match the temperature rating with the geyser’s approved operating temperature. Many domestic systems use a high-temperature limit near 99°C, but this is not universal. Confirm the exact requirement in the equipment documentation.

Tip 3: Verify the connection size, thread type, and discharge direction. The valve should release water safely through a visible discharge pipe. Do not cap or block that outlet. A qualified technician should inspect installation, especially where water pressure fluctuates. I once underestimated how much confusion different pressure units create. That mistake changed how I check every label. Buy from a traceable supplier, retain the documentation, and replace a valve showing corrosion, leakage, or repeated discharge.

Which Valve Materials and Sizes Suit Your Geyser

Choosing a geyser pressure valve starts with two practical questions: what is it made from, and what size fits your system?

Brass valves suit many household geysers because they handle heat, pressure, and regular water contact. Stainless steel offers better resistance in coastal or highly corrosive environments. Hard water can still leave mineral deposits on either material. Check the valve’s pressure and temperature ratings, not only its appearance. A shiny finish proves very little.

Size must match the geyser connection and the discharge pipe. Measure the threaded inlet carefully, including the diameter and thread type. A valve that looks close may leak or damage the fitting. The discharge outlet should also accept a pipe that directs hot water safely toward a visible drain point. Never reduce its opening with an unsuitable adapter.

I once saw a valve replaced without checking the thread standard. It fitted loosely and began dripping within days. That mistake was avoidable. Follow the geyser manufacturer’s specifications and local plumbing requirements. A qualified plumber can confirm the correct pressure setting, material, and connection size before installation. Small details matter.

Installation Features That Improve Safety and Performance

When buying a geyser pressure valve, inspect its installation features, not only its price. The pressure rating must match the geyser’s specifications. A mismatch can cause nuisance discharge or dangerous pressure buildup. Check the inlet size and thread type before ordering. Small details matter.

Choose a valve with a clear discharge path and a sturdy test lever. The outlet should accept a correctly sized drain pipe. That pipe must slope downward and end where escaping hot water remains visible. Never install a shutoff valve between the geyser and its pressure valve. It can block essential relief protection. The valve should sit in the correct orientation, with enough space for testing and replacement. A cramped position often leads to neglected maintenance. Do not guess.

During installation, use suitable sealing methods without blocking the valve opening. Excess sealant can enter the mechanism and prevent proper operation. In closed plumbing systems, ask whether thermal expansion protection is also needed. A pressure valve cannot solve every pressure problem. After installation, check for leaks and operate the test lever according to the manufacturer’s instructions. Water should discharge briefly and stop afterward. If it continues dripping, replacement may be necessary. One overlooked issue is pipe material: weak or heat-sensitive tubing can fail even when the valve works correctly. Have a qualified installer verify the final setup, especially when the geyser is placed above living areas.

7 Geyser Pressure Valve Tips Every Buyer Should Know

Installation Features That Improve Safety and Performance

Why Temperature Control Matters

Water vapor pressure rises rapidly as temperature increases. The chart shows the saturation pressure of water at common geyser temperatures, using absolute pressure values in kilopascals. These figures are physical reference data, not replacement values for the valve rating specified by the water-heater manufacturer or local code.

  • Choose a pressure-relief valve with a set pressure suitable for the geyser’s rated working pressure.
  • Confirm that the valve’s temperature and pressure ratings match the appliance requirements.
  • Install the valve directly in the designated connection without placing an isolation valve between the tank and relief valve.
  • Use a discharge pipe that remains visible, unobstructed, and directed to a safe drain location.
  • Keep the discharge line continuously downhill where required by local installation rules.
  • Check that the valve is installed in the correct orientation and remains accessible for inspection.
  • Test the relief mechanism periodically and replace any valve showing corrosion, leakage, or restricted movement.

Maintenance, Testing, and Replacement Signs to Check Before Buying

7 Geyser Pressure Valve Tips Every Buyer Should Know

Maintenance, Testing, and Replacement Signs to Check Before Buying

A pressure relief valve protects a geyser from dangerous pressure buildup. Check the valve body, outlet, and discharge pipe before buying. Look for rust, white mineral crust, damp threads, or water marks on the floor. These details often reveal slow leakage. The discharge pipe should point downward and end safely, without a cap or blockage.

Testing needs care. Turn off the heat source and follow the unit’s instructions before lifting the test lever. Hot water may discharge quickly. Lift it briefly, then release it. The valve should stop flowing cleanly. If water keeps running, the valve may have failed. If nothing comes out, mineral deposits could be blocking the opening. Both conditions require professional attention. Never force a stiff lever.

Replacement signs include repeated dripping, visible corrosion, damaged threads, or a valve that will not reseat. A valve that looks acceptable can still be unreliable inside. I once trusted a clean-looking valve and overlooked a crusted discharge opening. That was a poor inspection. Check the valve’s pressure and temperature ratings against the geyser’s specifications. Do not install a random substitute. Local plumbing rules may also require a qualified technician. A careful buyer should ask when the valve was installed and whether the geyser has experienced overheating or pressure problems. Records are useful, but they are not proof of current safety.

7 Geyser Pressure Valve Tips Every Buyer Should Know? - Maintenance, Testing, and Replacement Signs to Check Before Buying

Tip What to Check Before Buying Why It Matters Practical Test or Maintenance Step Replacement Warning Signs Buyer Action
1 Confirm the valve type and function A geyser may require a temperature-and-pressure relief valve, a pressure-only relief valve, or another valve specified by the heater design. These devices are not interchangeable.
  • Read the geyser data plate and installation manual.
  • Check whether the existing valve protects against pressure, temperature, or both.
  • Confirm the connection size, thread type, discharge orientation, and rated capacity.
The valve has an unknown specification, missing rating information, damaged threads, or a different connection from the original installation. Buy only a valve that matches the heater’s documented requirements. Do not select one based solely on appearance.
2 Verify the pressure rating The relief setting must be suitable for the geyser and the building’s water system. A valve set too high may not protect the tank correctly; one set too low may discharge unnecessarily.
  • Compare the valve’s pressure rating with the heater nameplate or manual.
  • Measure static water pressure with a calibrated pressure gauge at a suitable connection.
  • Check for pressure spikes when water heats or when fixtures close.
The pressure rating is unreadable, does not match the heater documentation, or the system pressure repeatedly approaches the valve setting. Use the exact approved pressure range for the specific geyser. If pressure is excessive, investigate a pressure-reducing valve or expansion-control solution.
3 Inspect the discharge pipe arrangement A relief valve must be able to discharge hot water safely. A blocked, capped, undersized, or incorrectly routed pipe can make a correctly rated valve unsafe.
  • Ensure the outlet is directed toward a safe, visible drainage point.
  • Check that the pipe slopes continuously where required and is not blocked or kinked.
  • Confirm that no shutoff valve, cap, plug, or restriction is installed in the relief path.
Water cannot drain freely, the pipe terminates in an unsafe location, or corrosion and scale restrict the outlet. Correct the discharge arrangement before operating the geyser. Never isolate or obstruct a relief valve outlet.
4 Check for continuous dripping Occasional discharge during heating can indicate thermal expansion, but persistent dripping may indicate debris, excessive pressure, overheating, or a worn valve seat.
  • Observe the outlet when the geyser is heating and when no fixtures are running.
  • Use a pressure gauge to compare cold static pressure with pressure during heating.
  • Inspect for mineral deposits around the outlet and valve body.
The valve continues to drip after pressure conditions return to normal, leaks from the body, or shows heavy scale or corrosion. Do not permanently cap or plug the outlet. Identify the cause and replace the valve if the seat does not reseal properly.
5 Understand safe manual testing Manual testing can show whether the valve opens and reseals, but the discharged water may be extremely hot and can cause severe burns.
  • Follow the heater and valve manufacturer’s instructions.
  • Keep people away from the discharge point and wear suitable protection.
  • Operate the test lever only briefly, then release it and confirm that flow stops completely.
No water flows when the lever is operated, the lever is stuck, the valve does not close afterward, or water continues to discharge. Stop using a valve that fails the test and arrange replacement by a qualified technician. Do not force a stuck lever.
6 Look for age, corrosion, and contamination Heat, minerals, corrosion, and repeated discharge can reduce reliability. A relief valve may look acceptable externally while its internal spring or seat is deteriorated.
  • Inspect the valve body, spring area, lever, fittings, and discharge outlet.
  • Look for rust, mineral buildup, damaged seals, distorted parts, or evidence of previous leakage.
  • Review service records and the installation date where available.
Visible corrosion, mineral accumulation, damaged components, repeated leakage, or an unknown service history. Treat an old or visibly deteriorated valve as a replacement item, especially during geyser replacement or major plumbing work.
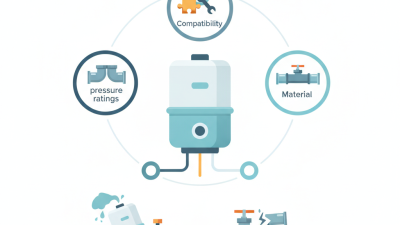
7 Check compatibility and installation quality Correct performance depends on matching materials, connections, temperature rating, pressure rating, and installation method. Incorrect sealants or excessive tightening can damage the valve.
  • Compare inlet size, thread type, temperature rating, pressure setting, and flow capacity.
  • Check that the valve is installed in the correct port and orientation.
  • Confirm that the valve has not been painted, modified, disassembled, or fitted with an unauthorized extension.
The valve is forced into an incompatible fitting, installed backward, modified, cross-threaded, or sealed with material that obstructs the opening. Use a qualified installer when specifications or local plumbing requirements are uncertain. Test the completed installation for leaks and free discharge.